|
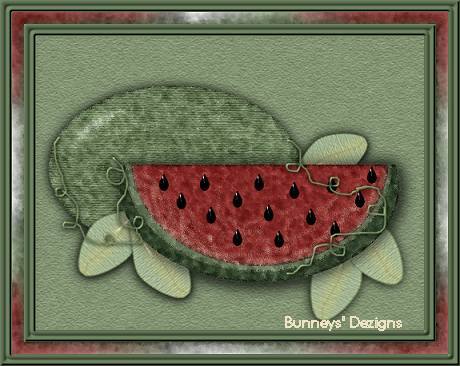
Drawing A Watermelon This is a quick and easy tutorial written in PSP 7 But can easily be modified to be used for PSP 6. We are just using the basic round shape. I use the filter Fantastic Machine Paint Engine which you can find HERE. This is optional however. Once you download it unzip it to your psp plug-in folder.
Open a new transparent image
500 by 500. Add a new layer and name this layer sm watermelon. Your foreground
color should be a light green I am using #COD5AC Your background color should be
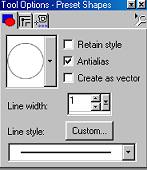
a dark green I am using #596A4E. Using your present shape tool
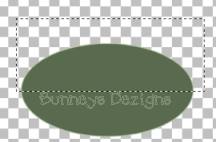
Draw a oblong shape similar to this
Yours will be larger as this image is resized for
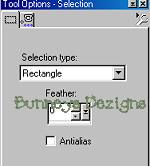
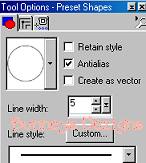
download time. Use your selection tool
Draw a square around the top part of your watermelon image like this
Then hit delete on your keyboard so that it removes
the selected area . You should now have this
I added a texture to my watermelon by using the
texturize filter, This is optional . If you want to add a texture do so now.
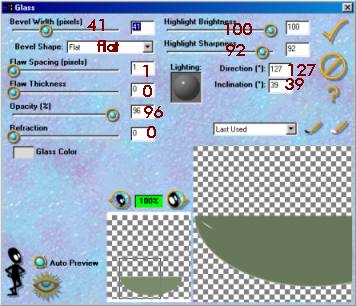
I then added a filter using eye-candy 3.0 so go to effects, plug in filters
eye-candy 3.0 and use these settings I am using the glass eye-candy
Click ok, then we want to go ahead and add our plug
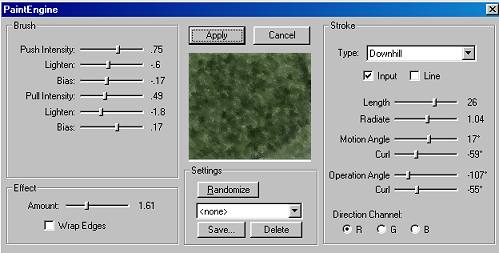
in filter paint engine. So go to effects, plug-ins filters, fantastic
machine, paint engine and use these settings
Add a new layer, and swap the colors on your color
palette. Your foreground will be dark green and your background color will
be light green. Draw another circle like we did before using the same
settings, Draw this just inside of the darker green one like this
Use your selection too again and get even with the
darker green part of your watermelon like this
On your keyboard hit the delete key to take the top
part of the lighter green away like we did on the darker green. Your
watermelon will now look like this
Add your texture to the lighter green if you have chosen to use a texture. Remember this is optional. Now add your eye-candy glass filter as we did above and then your paint engine filter as we did above also. Add a new layer.
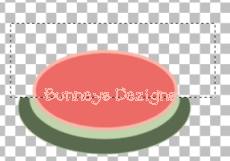
Now for the inside of the watermelon, Change your foreground color to a light red or pink, I am using #F8B8AC. Your background color needs to be a darker red or pink I am using #EC6B66. And once again using your present shape tool this time we are changing the line width to these settings
draw a smaller circle just inside the lighter green like this
Again using your selection tool get as close to the top of the lighter green as you can and select the top part of the pink watermelon like this
Hit the delete key on your keyboard like we did
above to remove the top part of the red watermelon like this
Once again don't forget to add your texture, then your eye-candy plug in filter using the same settings as before and then your paint engine plug in as we did before. Now you can merge these layers . Make sure you place an X on layer 1 before merging these layers.
Now for the seeds. Go to page 2
This Tutorial ©
Bunney's
Burrow 2001
|