|
Cooky This tutorial was written in PSP 7 using vectors. You will also need Fantastic Machines Paint Engine Filter which can be downloaded here.
Lets Begin Remember to save often!
Open a new 600 by 600
transparent (16.7 Million Colors) image. This is rather large but we can always
resize later. Your foreground (styles) color should be black, your background
color should be purple or a color you want for your spider. I am using #800080.
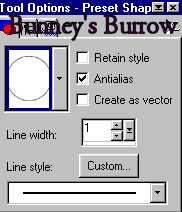
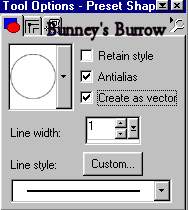
Using your preset shapes tool
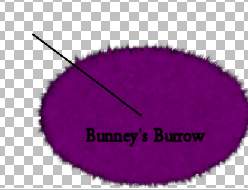
About half way down your image, Draw an oval shape for your spiders body like this.
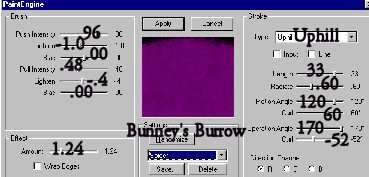
Your image will be larger and have more detail this one has been resized for download time. Go to filters, plug-ins, Fantastic Machine, Paint Engine and use these settings
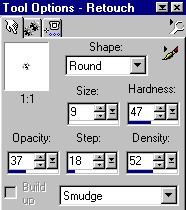
Using your retouch tool
And begin pulling outward around your spiders body to create some fur. Your finished body should look similar to this.
Change your background
color to black so that your foreground (Styles) color and background colors are
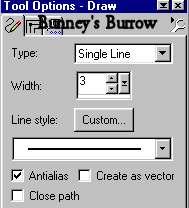
both black. Add a new raster layer and name this layer legs. Using your draw
tool
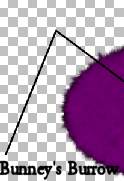
Locate the center as best you can of your spiders body and begin to draw a small line going up like this
Now draw another line going down to create a joint for the legs like this
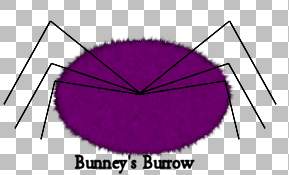
Don't worry that this layer is on top of your spiders body, We are going to move that after we get the legs drawn. Continue drawing legs like this on both sides of the spider till you get something like this
Now we need to drag this layer all the way to the bottom of our layer palette so that the legs are up under the body.
Add a new raster layer and
name this layer feet. Change your background color back to the purple or color
you used for your spiders body. I am using #800080.
Going back to your preset shapes tool
Draw a small oval shape for
his feet. Keep in mind that when you draw your oval shape its not going to match
up the way we want it to so you will have to use your mouse to rotate it. To do
this move your mouse over the inside of your oval shape until you see two
arrows. Then rotate it where it is just under the spiders leg. Now go to your
object selector tool
You just want your bottom flat. When you get thru editing the foot right click again and go to quit node editing. The to layers convert to raster. I added an inner bevel to mine using eye-candy, This is optional. You may wish to use PSP inner bevel to add a bevel. That's up to you:0) Now you can edit copy edit paste as a new selection and place the feet on the rest of the spiders legs. The feet on the right side you will need to go to image mirror to get those where you need them. This is what you should have at this point.
To finish our spider up go to page 2. We will add the eyes and facial features there.
|