Bunney's Scare
Crow Tutorial
Page 3
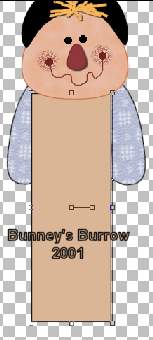
Add a new raster layer and name
this layer shirt. Feel free to right click and save as to your hard-drive if you
would like to use this one. Open up in psp and have this image ready if you
chose to use this one.

Its there just a bit hard to see because of the
background:))
Ready again? LOL. Add a new raster layer and name this layer shirt. Using
your preset shapes tool

Using your rectangle shape,

Change your fore-ground (styles) color to black , now your background color
what we are going to do is make sure your pattern that you saved or a
pattern that you want to use for his shirt is open in psp. On your color
palette click on the little arrow on the background color and chose pattern
fill the one with the dots
Now click on the box with the pattern in it and it will open
up a new window browse to find the pattern that you are going to use

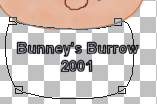
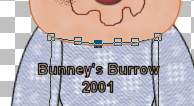
Right up under your scarecrows head draw rectangle shape just
needs to be a small one because this is just the inside part of his
shirt. Using your object selector tool  right
click inside his shirt and go to node edit, you have 4 nodes one for each
corner, click on one of those nodes and go to node type then symmetric like we
did before. Do this to each of the 4 (four) nodes. The bottom two you really
don't need to do anything else to those. The top two nodes, you will need to
move the arrows around so that the top is curved to fit his head like this
right
click inside his shirt and go to node edit, you have 4 nodes one for each
corner, click on one of those nodes and go to node type then symmetric like we
did before. Do this to each of the 4 (four) nodes. The bottom two you really
don't need to do anything else to those. The top two nodes, you will need to
move the arrows around so that the top is curved to fit his head like this
Once you have the shirt the way you want it right click again
and go to quit node editing. Then go to layers convert to raster. Open your
layer palette and drag this layer all the way to the bottom just below the
head layer. Working with vectors put your image on a layer all by itself plus
we added a layer so you will have an extra layer.
I added the Texture, Texturizer filter using the denim you
downloaded at the beginning of the tutorial. You can add that texture now by
going to effects, plug-ins, texture then texturizer and browse where you have
your psd files downloaded and find your denim texture. I changed the relief on
mine to 2 instead of 4 for his shirt but that's up to you))
Add a new raster layer and name this layer arms, Using your preset shapes
again this time going back to the ellipse shape with these settings

Draw an oblong oval like this
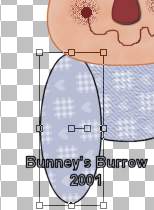
We need to edit just a little so using your object selector tool right click
and go to node edit , Your bottom node click on it and you will get an
arrow, drag this arrow up and to the right just a little and pull the back
of the arrow down and to the left your top node you will need to make it
plush with the scarecrows head, once you get your arm the way you want it,
right click and go to quit node editing. Go to layers convert to raster and
then edit copy, edit paste as a new selection and place on the left side of
your scarecrow. this is what you should have at this point.
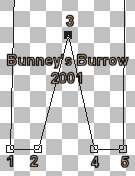
Now to add his overalls, Add a new raster layer and name this layer overalls
lol. Using your preset shapes tool again only we are going to use our rectangle
settings again, same as earlier and create as vector IS checked. Now draw a
rectangle for his overalls like this
Now once again we need to edit it, so using your object
selector tool right click and go to node edit, Using your CTRL on your
keyboard move your mouse to the top of the rectangle line until you see add,
we want to add 4 (four) nodes like this
Bring 2 and 5 in a little and down nodes 3 and 4 need to be brought down to
where they form a line like this
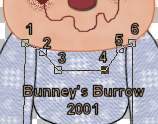
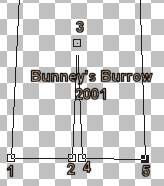
On nodes 3 and 4 you need to right click and go to node type and chose
symmetric. this just rounds it a little. And then go to the very bottom of
your rectangle. We need to add 3 nodes to the bottom spaced evenly.
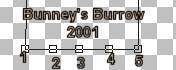
bring node 3 straight up about half way to the middle like
this
Nodes 2 and 4 need to be brought in to the middle
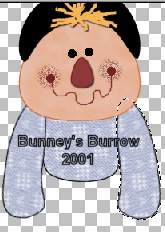
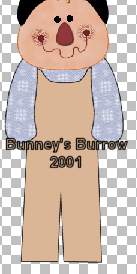
Now once you get your overalls set the way you want them right click and go
to quit node editing. then to layers convert to raster layer. This layer
needs to be brought above the arms layer. We want the arms to cover the
overalls, This is what you should have now
I added the DBS Flux filter bright noise effect to the overalls, Here are
the settings I used
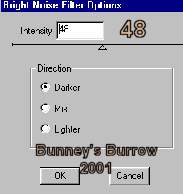
I then added the Texture denim we used earlier on the
Scarecrows shirt only I changed the relief back to 4. To finally finish up go
to page 4.
