Bunney's Trick or Treat
Halloween
Cat Tutorial
Page 2
Add a new layer and name this
layer bag front. Go to selections, load from disk and locate your bagfront.sel
file and click ok. Your foreground (styles) color should still be set at black,
change your background color to an orange for your bag. I am using #D77F29.
Flood fill with the black and go to selections, modify, contract by 3 and flood
fill again with your orange. For the front of the bag I have used my texturizer
filter, you can download the psd file here if you wish to use the texturizer
filter for this step You will also need the filter Texture, Texturizer that I
have zipped for you in the beginning of the tutorial:0) This filter needs to go
into your psp plug-ins
folder.
If you have chosen to use the texturizer filter then go to effects, plug-ins,
texturize, texturizer, and apply the PSD flur this just gives your trick or
treat bag a little texture, but feel free to use another one if you like:0)
Add a new layer and name this
layer bag side, go to selections, load from disk and locate your bagside.sel
file, click open and flood fill again with black and go to selections, modify,
contract by 3, flood fill again with orange and use the same psd flur if you
chose to use that one:0)
Now again add a new layer and
name this layer bag top, go to selections, load from disk and locate your
bagtop.sel file and click open, on this one you just need to flood fill it
with black and go to selections, select none.
Add yet another layer, I
know I use a lot of layers but that's
just incase a mistake was made you don't have to go back and redo the entire
thing, Add a new layer and name this layer words, Unless you would like to add
your
own words, I have added the Trick or Treat words for you. So open your words.sel
file and click open, I just flood filled this with black and clicked selections,
select none. If you wish you can add a drop shadow to your words at this time.
That's up to you , I have added a slight drop shadow to mine:))
Ok, add a new layer once again
lol and name this layer bag handles, locate your baghandle.sel file and click
open flood fill with black and go to selections, modify, contract by 2 this time
instead of 3. Flood fill with your orange once again. You can also add a drop
shadow if ya wish or an inner bevel, I have added a drop shadow to mine.
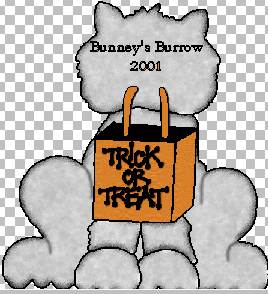
Your Halloween Cat should look something like this at this point:))

Looks funny with no face
doesn't she? LOL..
We are going to add that next:)) So add (yes you guessed it ) add a new layer
and name this layer whiskers. Go to selections, load from disk, and locate your
whiskers.sel file and click open, flood fill this with black only. You can add a
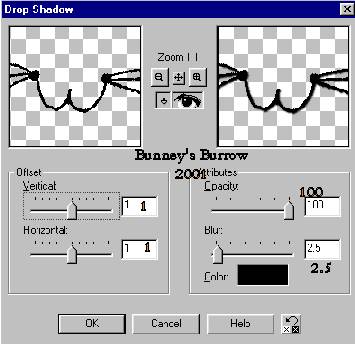
drop shadow here if you wish also, I have used a drop shadow by going to
effects, 3D effects, drop shadow and use these settings, these are also the same
settings I have used for all my drop shadow settings.

Again, add a new layer and name this layer
nose, go to selections, load from disk, and locate your nose.sel file click
open. Flood fill with black only once again. Apply a drop shadow if you wish. I
used the same settings as above for my nose.
Ok getting tired of layers yet?? sorry But I like using
layers,
hehe.
Again add a new layer and name this layer eyes, yes I even have the eyes as a
selection file:0) Go to selections, load from disk, and locate your
eyes.sel click open and flood fill with black and again add the same drop
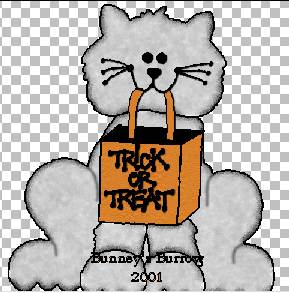
shadow. Starting to take shape huh? LOL. Your cat should now look something like
this.

We are almost done, If you would like to add the bow and hat,
move on over to page 3.
Page
3
This tutorial ©
Bunney's
Burrow
2001