Bunney's Trick or Treat
Halloween
Cat Tutorial
Page 3
Now for her bow, add a new
layer and name this layer bowtops, go to selections, load from disk and locate
your bowtops.sel file click open and flood fill with black, then go to
selections, modify, contract by 2, and flood fill with a
n
orange color , I am using #F9BD7E
. After you flood fill your selection add a texture of your choice, I am
using a PSD texture for the bow which you can download
here,
go to effects, 3D
effects, texture, texturizer and apply the denim psd file. Now I added
an inner bevel to my bow by going to effects, 3D effects, inner bevel and used
these settings
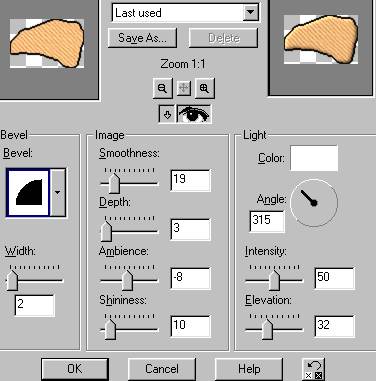
Apply a drop shadow if
you wish at this point. Add a new layer and name this layer bowbot2. Go
to selections, load from disk, and locate your bowbot2.sel, flood fill with black, go to selections, modify, contract by 2 and flood fill
with the orange. Now use the same denim psd texture as you did on your
other bow tops, Then apply the same inner bevel as before. Add a new layer and name this layer
bowtops2, go
to selections, load from disk and locate your bowtops2.sel file and click
open, flood fill with black and go to selections, modify, contract by 2 and
flood fill with your darker orange #D77F29 add the same psd
texture file as before and apply the same inner bevel and add a drop shadow.
Add a new layer and
name this layer bowbottom2a go to selections, load from disk and locate
your bowbottom2a, Click open and flood fill with black go to selections, load from disk and
flood fill again with the darker orange #D77F29 once again add the same psd texture file and the same inner
bevel as well as a drop shadow;)) Last step lol Add one more layer and name
this layer ribbonmiddle locate your ribbonmiddle.sel file and click ok. Flood
fill with black and go to selections modify expand by 2 and flood fill with the
darker orange. Add the same texture and same inner bevel.
Ok Last but not least we need to add her hat,
add yet one more layer phew LOL and name this layer hat. Go to selections,
load from disk and find your hat2. sel file and click open, flood fill with
black and go to selections modify, contract by 3, flood fill with the
darker orange, you can now add a texture to her add if you wish, I left mine
as it was, however I did use my magic wand and clicked on each
individual star and flood filled it with a light yellow. I used #FFFF80, Now
we want to add an inner-bevel
to her hat, I used these settings
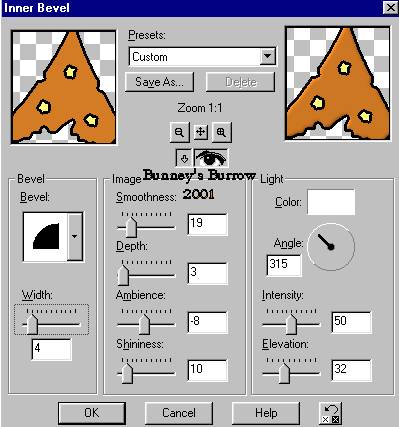
Apply a drop shadow if you wish. Only
two more steps and we are done;))

Add a new layer and name this layer inner ear left, locate your
insideearlet.sel file and click open. Flood fill with black. Add a drop
shadow if you wish. Add one more layer and name this layer inner ear right,
locate your insideearright.sel file and flood fill with black, add a drop
shadow if you wish as well. You are now done with your Halloween cat;))
Phew are you glad that's
over with LOL.. Wasn't to bad was it LOL just a LOT of
layers and selection files. I hope you have enjoyed this tutorial as much as I
have creating it, If I have left something out or something is unclear to you
please don't hesitate to email me at kitchel@webworkz.com
and I will answer all email as soon as possible.
Bunney's
Burrow
This tutorial ©
Bunney's
Burrow
2001