|
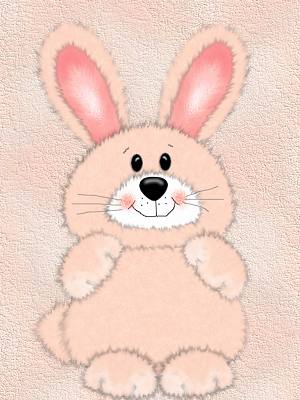
Fuzzy Bunny Tutorial Page 3
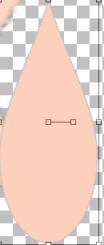
Going back to your present shape tool
your background color should now be set back on the color you chose for your
bunny. Your foreground color should now be the gray you have been using. Using
your present shape tool this time we want to use the teardrop like we did for
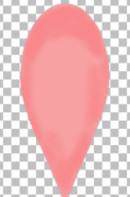
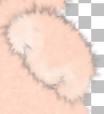
our body. Draw a long oblong teardrop similar to this one
You do not have to have create as vector checked
unless you want to edit this shape. I did not want to edit it so I just drew
a long oblong teardrop like the one above. Now go to image flip and then
using deformation tool
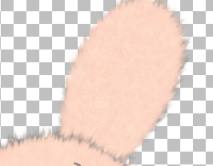
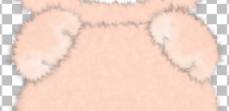
Drag your ear layer all the way below your head layer so that your ear is behind your head. Edit copy edit paste as a new layer your ear so that you have two. Then image mirror and place the second ear to the opposite of the first one like this
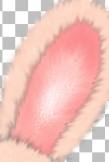
Now add a new layer and name this layer inner ear. We are going to use the same color we used for our cheeks for the inner ear so change your background color to a light pink I am using #F8A0A2. Your foreground color should still be gray. Now we are going to draw an oblong shape teardrop using your present shape with create as vector UNCHECKED like we did with the outer ear. Only this one will be smaller. Here is what mine looks like. Yours will not have the white or the fur yet.
You will need to flip this image once you get it drawn so go to image flip and place this ear using the deformation tool like we did with our outer ear and rotate it and slide it just on top of your outer ear. Make sure that this layer on your layer palette is on top of your outer ear layer.
Now doing something a little different I
wanted the darker pink on the outer part of his ear this is totally optional
.. I just wanted a little extra something to his ear so what I did was make
sure you are on your outer ear layer and using your magic wand
Change your foreground color to a darker color of pink I am using # F8A78A and your background color should be set on null. Now just go around the outer part of the outer ear like I have here
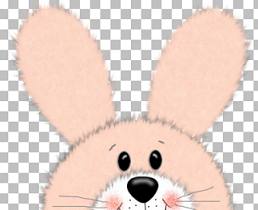
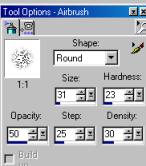
Change your foreground color to white and change the airbrush settings to this
Now just spray a little white on the inside of the darker pink. Now go to effects, plug-ins, fantastic machines paint engine and use the same settings as we did before. Then once again go to your retouch tool same settings and create your fur pulling it outward as we have done before. Once you get your inner ear the way you want it go to edit copy, edit paste as new layer and then image mirror and place this ear on the opposite side, This is what you should have at this point. Make sure you add your drop shadow to each layer of your inner ears.
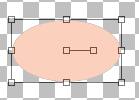
Add a new layer and name this layer front paw. Change
your foreground color back to gray you have been using, Change your
background color to the color of your bunny. Using your present shape tool
this time making sure create as vector is CHECKED and using the eclipse like
we did on the head. Draw a long circle similar to this one
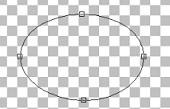
Right click and use your object selector tool and go
to node edit and pull the top node up just a little the two side nodes need
to go out just a little and the bottom node needs to go down just a little
similar to this one
Notice I didn't change the nodes very much. You can
play around with the nodes to get your paw the way you want it. Once you
have it set the way you want your paw right click and go to quit node
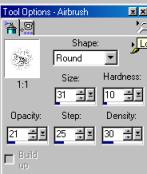
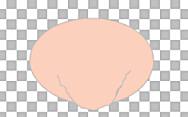
editing. Now we want to add a little detail so using your airbrush
change your foreground color to a light cream color this part is optional
and we are going to add a little color to the bottom of the hands like we
did the outer ear. Use the same settings as we did on the outer ear and your
background color should be set to null. Spray a hint of cream to the bottom
part of the paw. We will be adding more detail here in a second. Once you
get your paw the way you want add the plug in filter paint engine using the
same settings as we did before. Now using the draw tool with the width set
at 2 change your foreground color back to gray, your background color needs
to be the color you are using for your bunny at this point. if you use your
draw tool and draw a simi-circle like this it will auto fill in
I made this one a little larger so I could show you what I did. Now add two lines at the top of the straight lines but this time make your background null. And change the line width back to 1.
You can add the same filter if you wish once you get the gray lines drawn in or you can leave it as it is. However don't forget to add your fur like we have before using your retouch tool with the same settings bringing the fur out this is what mine looks like
This one has already been rotated using the deformation tool as well. You can place your paws where you would like, Now we want to edit copy edit paste as new layer and image mirror and place it on the opposite side like this and now add your drop shadow to both of your paws. Just use the same settings as before.
Now all that's left is the feet and the tail. So If you will follow me to page 4 we will add those now:0)
This Tutorial ©
Bunney's
Burrow 2001
|