|
~Chicky~ Page 3
Now making sure that your background color is
again set on the yellow we have used for the body. I am using #FFFF80. Your
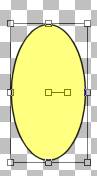
Foreground color is still set to black. Using your present shapes tool make
sure vector IS CHECKED browse to the present shape eclipse like you used on
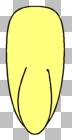
the chicks head. Now draw a small shape similar to this We will be editing it
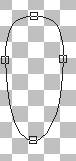
So go to your object selector tool and right click in the center of your
shape and go to node edit.. We will be moving the top node down to form a
semi flat top, move the left and right nodes in just a little and the bottom
node needs to come down like this
Once your get the wing in the shape you want it right click again and go to
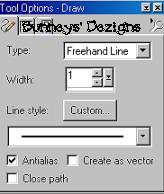
quit node editing. Click layers convert to raster. Now going back to
our draw tool using these settings
Go back to the wing you just created and draw a bottom part of the wing like this
This just gives it more dept to the wing, Now we want to use
our filter paint engine once again. So go to effects, plug-ins filters,
fantastic machines, paint engine and once again use the same settings as
before.
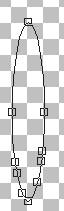
Now for the feet. Add a new layer and name this layer feet. Change your background color back to the orange you used for you beak. Your foreground color should still be black. Using your present shapes tool use the same eclipse we used on our head draw a long oblong shape for your feet like this
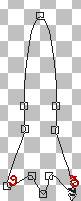
We want to edit this shape so using your object selector tool right click on
your shape and go to node edit. We need to add some nodes to this shape so
using your Ctrl on your keyboard move your curser and add 3 nodes to each
bottom part of our leg like this
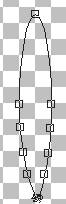
Now we want to edit those nodes we just added.. Using your cursor pull the bottom node out like this
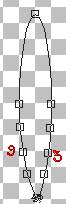
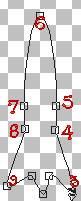
Now we want to pull node 3 to the right and down a bit and pull node 9 to the left and down a bit
This is what you should have after you have pulled 3 and 9 nodes down
Now we want to pull nodes 4 and 5 in to the left and pull nodes 7 and 8 in to the right and node 6 needs to be pulled toward the bottom .
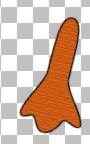
Once you have your foot shaped the way you want it right click and click quit node editing. Go to layers convert to raster. This is what your foot should look like now or something similar. I have already added a texture to my foot so do that now if you want to use the texture.
Now go to edit copy, edit paste as a new layer and image
mirror and place this foot on the right side.. These layers need to be under
your body layer. So move those layers now. We dont want to merge our layers
yet as we may want to change our feet.
We are almost done. Proceed to page
4 to finish our Chicky up:0) This Tutorial ©
Bunney's
Burrow 2001
|