|
~Chicky~ Page 4
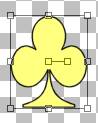
Add a new layer and name this layer tail. Change your background
color back to the color you are using for your chick. Your foreground
color should still be black. Using your present shapes tool we want to use club
1
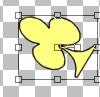
The two little nodes that are on the inside of your club if you take your cursor and place it on the outside node you will see a curve this is how you rotate your image we need to rotate it to the left like this
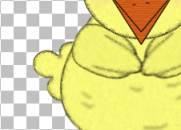
Going back to your plug-ins, filters, fantastic machine, paint engine use the
same settings as we did before on our head and body. Move this layer beneath
your body layer and position it on the left side like this
Now all that is left is adding some detail to his body. So add a new layer make sure this layer is all the way to the top of your layer palette otherwise you will not see your lines.
Use your draw tool same settings as before.
Begin drawing lines here and there to give this chick some detail. Use your
imagination:0) Once you have your lines drawn we don't want those to be so
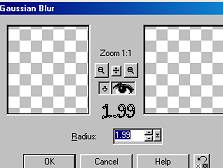
dark, So go to effects, blur, gaussian blur and use these settings
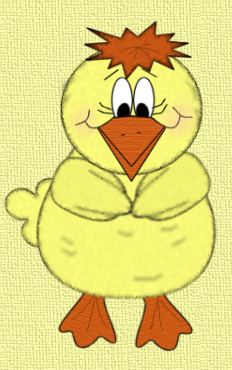
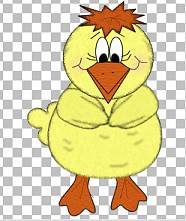
Here is what mine looks like after I added the black lines and gaussin blur
And that's it. You have yourself a cute chicky:))) He can
now be tubed for later use:0) Check out my other tutorials while you are here! Thank you! This Tutorial ©
Bunney's
Burrow 2001
|