|
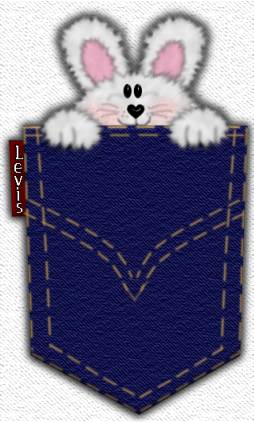
Page 2 Adding the Bunny
For this part of the tutorial you will need the Filter Fantastic Machines Paint engine which you can get here.
Add a new layer and name this
layer head. Your foreground (Styles) color should be black and your
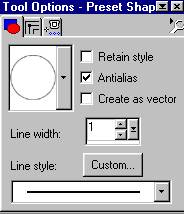
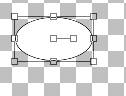
background color needs to be white. Using your preset shapes tool
Make sure Create as vector is NOT checked.
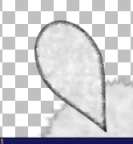
Now draw and oblong circle on your image don't worry if it goes over your
pocket because we will be moving this layer in a second. Go to effects
plug in Fantastic Machine, paint engine and use these settings or you can
play around with the settings to create your own unique look;0)
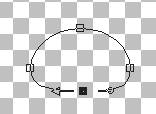
Now go to your layer palette and drag
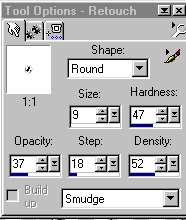
your head layer beneath your pocket layer. Using your retouch tool these settings
What you are going to do here is using your mouse
along the outer sides of your oblong circle where the black part area is
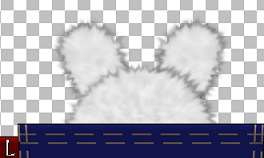
is drag outwards in small short outward strokes, Do this all the way
around the top part of your bunny's head. This may take some time and
remember if you did something you don't like just use your undo :0) Don't
get frustrated with this part as we are just wanting to add some fur to
this little guy and this has been the best way that I know how to
accomplish these even though it does take some time:0) Just continue doing
the outward strokes dragging outward you do not have to be precise with
the fur:))
When you have your bunny heads fur the way you want it add a new layer and name this layer left ear. Going back to your preset shapes tool
Draw an ear for your bunny head, You may have to
rotate it a little to get it positioned just right, you will also need to
go to image flip so that the point is under your bunny head. Position it
to the left side of your bunny head similar to this
You can now drag your left ear layer beneath your head layer so that his ear is behind the bunny's head. Now go to effects, plug in, Fantastic machines, paint engine as apply the same settings as we did for the bunny's head your settings should not have changed.
Now using your retouch tool
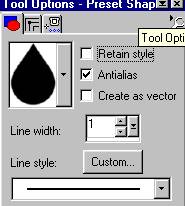
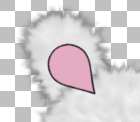
Add a new layer and name this layer inner ear. Change your background color to a light pink I am using #E5ABC2. Using your preset shapes tool again same settings make sure you are still on your teardrop shape and draw a small teardrop for the inner ear, You will need to also flip this image and place it right inside the left ear like this
Remember to rotate it so that it will
fit near the bottom of your left ear. You will also need to drag this layer
to just about your left ear layer so that it lays on top of your left ear
and under the bunny's head;)) now using the same Fantastic Paint engine
filter as we did before same settings apply the filter and also using your
retouch tool as we did on the ears and the head drag a small area of the
outer ear where the black lines are in short small strokes up and outward
so that the inner ear also has some fur;)) I know easier said then done but
really this part isn't that hard it just takes some practice to get
those little furry lines up and outward so keep practicing;))
Add a new layer and name this layer right paw. Make sure this layer is at the top of your layer palette. Change your background color back to white. Your foreground (styles) color should still be set on black. We will be using our preset shape ellipse using these settings
Draw a small oblong circle like this
Now using your object selector tool
Go to layers convert to raster. Click ok.
This next part is really repetitious for this part as well because we
want to add the same Fantastic Machines Paint engine settings to the paw
also so go to Effects, plug in, Fantastic machine, paint engine and use
the same settings as before and click ok, again using your retouch tool
After you have your right paw set the
way you want it, we want to add some detail to his paw Add a new layer
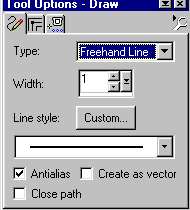
and name this layer paw detail and using your draw tool
change your foreground color to a light
gray I am
using #808080 Make sure you change your background color to null
Now draw a line similar to a W with curves on the bottom like this
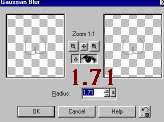
Now go to effects, blur, gaussian blur and use these
settings
Click ok, and open up your layers palette we want to
merge your paw details and your right paw so open up your layer palette
place an x on all layers except your right paw and paw detail layer, make
sure one of these are highlighted and go to layers merge visible, rename
this layer right paw. Now you can open your other layers back up by
clicking on the x. We want to make a duplicate image of your right paw so
go to edit copy, edit paste as a new layer and rename this layer left paw,
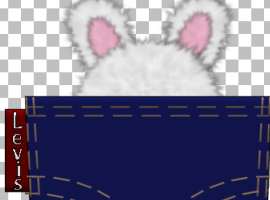
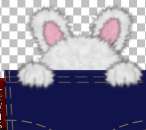
go to image mirror and place this paw on the left side of your bunny, You
should now have something similar to this
We want to give the bunny some eyes
and more detail so hop on over to page 3 to finish the bunny up ;)) We are
almost done I promise you;)) This Tutorial
©
Bunney's
Burrow 2001
|