|
Page 3
I have used eye-candy 4000 for this part of the tutorial, You can get a trial version of this here. Or if you have eye-candy 3.0 it will do the same effect using the glass. This is totally optional And is not totally necessary to complete this tutorial, It is just used to add a glassy look to the bunny's eyes and nose which can easily be done using your imagination.
Almost done , Add a new layer and name this
layer eyes, change your background color to black and your foreground (styles
) color needs to also be black for this step. Going back to your preset shapes
tool
Draw a small oblong circle for his eye, Now
using eye-candy 4000 or eye-candy 3.01 add a glass effect, I will leave this
effect up to you because of the different ways it can be done, it just gives a
little white dot to they eye the settings I used for this example are from
using eye-candy 4000 using the glass effect.
Go to edit copy, edit paste as new selection and set
this eye to the opposite of your other eye, This is what you should have by
now
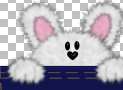
Add a new layer and name this layer
face detail. Using your preset shapes tool
Now just draw a small heart for the nose and if
your using Eye-candy 4000 for this tutorial then use the same settings we used
on the eyes using the glass effect. This just gives it a little glossy
color:0) Place this under the eyes like this
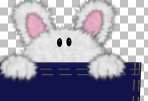
Now we need to add a new
layer no need to name this one at this point, Using your draw tool
Draw a u or W with the rounded corners for his mouth like this right under his nose.
While you are still using your draw tool draw about
three (3) freckles on each side of the bunny's
nose and then add three (3) whiskers on each side . Then right up under his eye
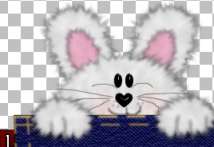
draw a rounded line outward from each eye you should now have something like
this you will not have the colored cheeks yet as shown here we are adding
that next.
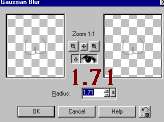
Then we want to add a blur like we did earlier using the
same settings as before.
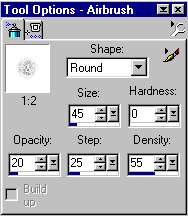
Add a new layer no need to name this layer either unless
you just want to we are just going to paint him some cheeks on now.
Change your foreground (styles) color to a light peach or red for his cheeks
doesn't
matter about background color at this point I am using #FF8080 Using your
airbrush tool
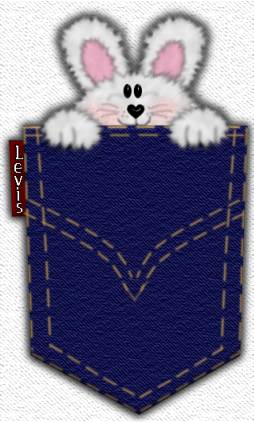
Spray two (2) circles on each side of his nose for
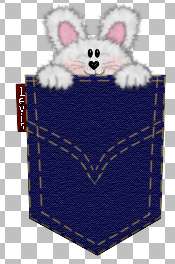
cheeks . And you now have a Bunny in a pocket:0)) You can merge visible these
layers and crop to the size you want at this point, Or you can tube your bunny
:)) Your imagination is the Limits:)) Your bunny should now look something
like this .
I hope you enjoyed this Bunny In My Pocket Tutorial as much as I have creating it for you;)) If something is unclear please feel free to email me at kitchel@webworkz.com and I will answer your email as quickly as possible;)) This Tutorial ©
Bunney's
Burrow 2001
|