Bumble Bee Boogie
Page 2
Now we are going to work on
our beehive. You can either create a new transparent image or work on the
same one with the bees. I am working on the same one with the bees. So add
a new layer and name this layer beehive. You can move your bee out of the
way at this point. We will bring him back a little later.
Chose a color for you
beehive I am using #EFA55A for mine. Your foreground color should now be
black and your background color the color you have chosen for you beehive.
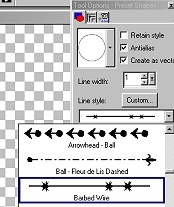
Using your present shape
with CREATE AS VECTOR CHECKED. I am using the eclipse as we did on the
bees head. But for the line I changed my lines to barbed wire like this
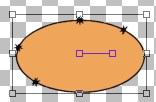
Now draw a circle similar to this one
..We will be node editing this one
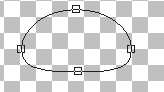
Now using your object selector tool once
again right click in the middle of your image and go to node edit. We
want to pull the bottom node up the side nodes in just a bit and
the top node up like this
Once you get the top part of your beehive
the way you want it go to layers convert to raster. The next few steps
of the beehive are pretty much repeating itself. What you basically want to do
is continue creating these vectors and node editing them until you get
something that looks like a beehive similar to this one
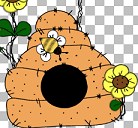
Your of course will look
a little different as You don't have your sunflowers yet. Make sure after
you create each vector shape you go to layers convert to raster on each
step!
Now once you get your
beehive the way you want it. We want to merge our layers so that its just
on one layer. If you have used the same image as our bee make sure you
place an x on the bee layer and layer 1 and merge visible the remaining
layers. And rename this layer beehive!.
Now We need to decorate the beehive just a little.. So using your draw
tool and these settings
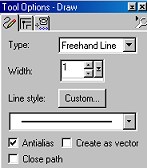
Make sure you background
color is set to null.
Now just draw short lines
around your beehive and add some small dots here and there like this one
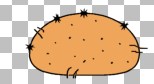
You need to do this for
the entire beehive. Once you have this the way you want it. We need to add
a new layer and name this layer door.
Change your background color back to black. Go to your present shapes tool
and chose eclipse and draw a circle in the center of your beehive. I left
my lines at the barbed wire for the door as well.. And all that's left on
your beehive is to merge these layers. So make once again if you used your
bee image to create the beehive that you place an X in your layers palette
on your bee layer and layer 1 and merge visible the remaining layers.
Rename this layer Beehive.
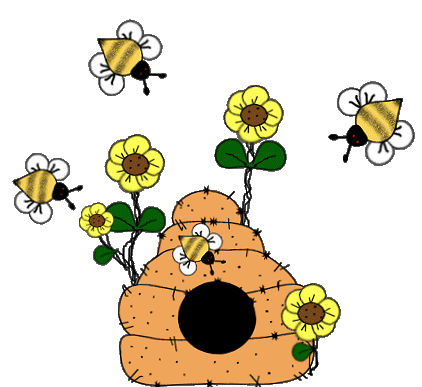
Now we have our bees, We have our beehive, Please go to page 3 if you
would like to learn how to make the sunflowers:0)
Page
3