|
Bumble Bee Boogie Page 3
Now that we have our bees and our beehive, we need to add our sunflowers. You can create a new image and work from there or use the beehive and bee image and work from this one. I am using the beehive and bee image. So You need to add a new layer and name this layer sunflower.
You can move your bee and beehive out of the way as we are done with those for now.
Chose a color for you sunflower I am using #FEFE57. So make sure you foreground color is set to black and your background color is set to the color you are using for your sunflower.
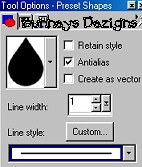
Using your present shapes tool using these settings IMPORTANT make sure you changed your line back to # 1 solid. We don't want to use the barbed wire with this one!
Now draw a small teardrop similar to this one
I am using the deformation tool as I showed you on the wings to rotate my petals you can use this or use your image rotate method which ever works best for you! Using your draw tool with the same settings we used before just draw you a little line from the center to the bottom of your petal like this
Now once again I am going to put each petal on a layer its own so that if you need to move one you don't have to go back and undo each layer. :0) We need to edit copy edit paste as new layer and rotate this petal pretty close the first one like this
Sometimes when we rotate our image it looses a little bit of sharpness. To fix that simply go to effects sharpen sharpen. And that takes care of the blurriness that rotating it sometimes leaves behind. Now continue to do this rotating each petal until you get a round circle like this.
Yours of course will not have the added inner part yet. we are doing that next. Now if you are happy with your flower so far, We need to merge these layers, If you are still using your bee and beehive image make sure you place an x over these two layers and your layer 1. and merge visible the rest of your petal layers. Rename this layer petals.
Now add a new layer and name this layer center. Using your present shape tool and the eclipse as we did earlier on the beehive. Chose a color for your center I am using #75471B. So your foreground color is still black and your background color is the color you have chosen for your sunflower center. here all we want to do is draw a circle in the center of our sunflower.. Simple enough huh? LOL. Now going back to your draw tool using the same settings just draw some small dots in the center of your sunflower and you should have something like this.
Now you can chose to merge this
layer with your petals layer and rename this layer sunflower if you wish.. But
once again make sure if you are still using your bee and beehive image that
you place an X over those layers and layer 1. Otherwise you will merge them
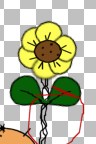
all and we don't want that;)) Add a new layer and name this layer stem.
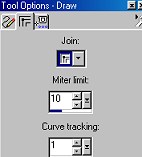
To do this just click on the middle of your draw tool as shown above and change your curve tracking. Now just draw some small curved lines going down your sunflower. Similar to this one.
Now we want to add a new layer and name this layer leaves. Using your present shapes tool once again with the same settings. The teardrop, chose a green for your leaves I am using #075F07. Draw a small teardrop for your leave. Using your draw tool same settings but making sure your background is now to null for the veins going down the leaves. Now just rotate your leaves so they are close to your sunflower like the image above!
Make sure your stem layers is
beneath your sunflower layer so that the stem is not showing over your flower.
And now all that is left is to merge these layers. Once you are happy with
your sunflower you can merge these layers, But once again Place an X over all
other layers, Especially if you are still using your bee and beehive image.
Place an x over bee and beehive layer and layer 1 and merge visible these
layers and rename this layer sunflower. And now you can tubes these images or
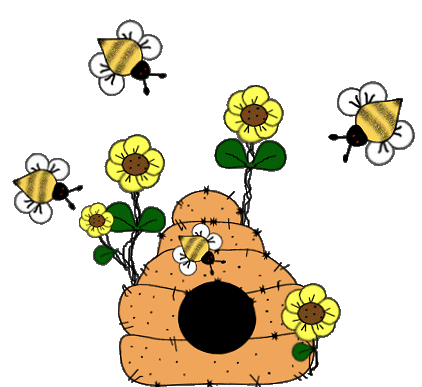
create a bumble bee boogie like I did:))) Most of all HAVE FUN!!!!
This Tutorial ©
Bunney's
Burrow 2001
|