|
Bunny In My Pocket Tutorial
This tutorial was written in PSP 7, But can be revised easily for PSP 6. For this tutorial you will need the Texturizer filter which you can get here. You will also need this PSD file, You will need to unzip this into your PSD folder or wherever you have your PSD files for this plug-in stored:))
Lets Begin
Open a new 600 by 600
transparent 16. 7 million color image. A little large but we can always resize
when we are finished. Set your foreground (styles) color to black , your
background color should be set to a dark blue for your denim jean pocket, For
this example I used #151859. We want to add a new layer and name this
layer pocket.
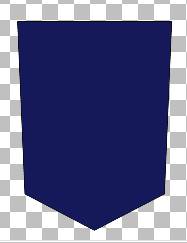
Now draw a rectangle in the
oblong shape on your image. Now using your object selector tool
Your image of course is going to be larger then this one as this one has been reduced for download time;)) Now using your mouse and click on the node we just added and drag it down to a point like this
Now going back up to the top of your rectangle
holding down your ctrl key on your keyboard once again we want drag the top
right node out just a little to the right this gives it a pocket shape. This
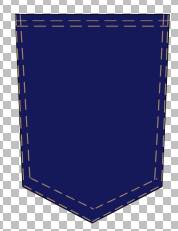
is what you should have now.
Go to layers convert to raster and click ok.
We want to add our texture to the pocket at this point so go to effects, plug-ins, texture, texturizer and apply the denim psd file using these settings
Add a new layer name this
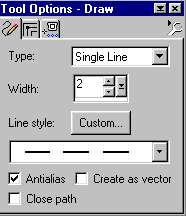
layer stitches. Now using your draw tool
Make sure you are using the # 5 Dashed lines for the stitches click on your arrow and browse to find your dashed lines. Chose a color for your foreground (Styles) for your stitches, I am using #A38669. Your background color should now be null
Using your selection tool
Remember your stitches will be more detailed this example looks as if the stitches are white but in fact they are the gold color we used earlier. Now we want to add another row of stitches along the edges of your pocket do this the exact same way we did before only making sure your pocket is still selected and you get as close to the edges as possible. Go along all of the edges except the very top we already have two there we do not want another row at the top so just do the sides and the bottom. you should now have something like this.
Again your stitches will be gold, for some reason the screen shots after saving this turned to white lol.. Now add a new layer and name this layer curved stitches. Using your draw tool again but make sure you change single line in your draw tool to bezier curve for your curved stitches.
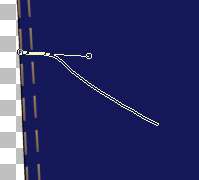
This can be a little tricky and may take some practice to get these lines drawn right believe me it took me some time lol you may get it the first try so don't give up lol. Now about half way down your left side of your pocket begin to draw your curved stitches, the tricky part for the bezier curve line is when you draw so draw a slant line going down toward the bottom of your pocket like this
Now going about half way back up your line you click on your line and you will get another line for you to drag this the way you want it you will need to pull it up to give your stitches a curve like this
Now you have to do this one more time down
toward the bottom of your line and drag it up toward the top. As I said before
this may take some practice if your not familiar with working with Bezier
curve lines. Took me forever lol. But here is what you should have now after
you drag your second line up.
Now you can either do a edit copy and edit paste and then a mirror and place this one on the right side of your pocket or you can do the exact same thing we did on the left side to make a curve for you pocket on the ride side.
Now you will just need to draw a couple of
lines in at the bottom of your corner stitches to give it the rounded V
effect. You should now have something similar to this.
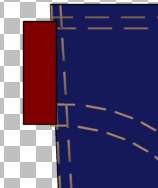
Now we want to add our tag, add a
new layer and name this layer tag. Your foreground (styles) color should
be a dark red or whatever color you want your tag to be I am using #800000.
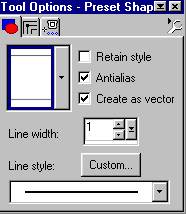
Going back to your preset shape tool
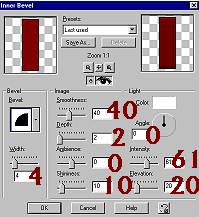
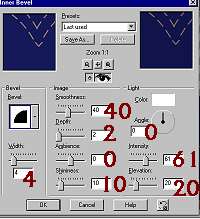
We want to add a small inner bevel to this tag,
so go to effects 3D Inner Bevel and use these settings
We need to drag your tag layer below your pocket layer so that its under your pocket. Open your layer palette up and drag it below there now:)) Now you can add your text for your tag using your favorite font I am using Flair. . After you add your text to your tag you can now merge visible all layers and name this layer Pocket. I added an inner bevel to darken my pocket just a little to give it that more denim look, so go to effects 3D effects, inner bevel and use these settings
Click ok and you can add a drop shadow if you wish I did not for this example for this tutorial:)) Its really up to you;))
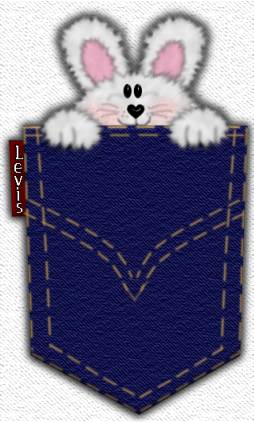
You have now finished your pocket, It you would
like to add something to your pocket as I have done then go on to the next
part of this tutorial:)) Your pocket should now look something like this:))
This Tutorial ©
Bunney's
Burrow 2001
|