|
Bunney's Santa Tutorial Page 3
Ok Lets finish up :0)) Add a new layer and name this layer face. Go to selections, load from disk and find your face.sel file and click open, change your background color to a light beige or pink for his face, I am using #FDE5CD. Flood fill with black and go to selections modify, contract by 2 and flood fill with the light beige color. Open your layer palette and drag this layer below your bootfurright layer like this,
Now we get to do something a little different,
yes, I said different LOL. believe it or not haha;0) We are going to add his
eyes, add a new layer and yes you guessed it name this layer eyes , now
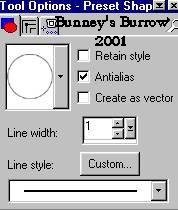
using your preset shapes tool
Now using your preset shapes tool find your ellipse shape with these settings
Now draw a small circle for your santas eye. Once you get your eye the way you want it , go to edit, copy, edit paste as new selection and place the other eye on the opposite side. now go to select and then none.
Change your foreground (styles) color to a
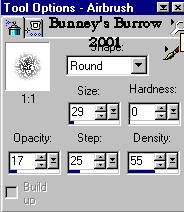
light pink for his cheek color I am using #FF8080. Now using your airbrush
tool
Now just spray a little color on your santas
cheek like this.
You don't see much of a change, but its just to add a little color:0) Now add yet another new layer and name this layer nose.. Cant forget his nose can we LOL. Go to selections, load from disk and yes I even created a nose.sel file for ya heeh, Click open and again flood fill with black and go to selections modify, contract by 1, notice that I said one (1) this time LOL. Chose a red color for his nose, I am using #C00000. flood fill again with this red color, go to effects, 3D effects, innerbevel and use these settings
Now open your layer palette and
highlight your bodyfur layer and go to layers add a new layer and name this
layer belt. Make sure your foreground (styles) color and background colors are
both black, and using your preset shapes tool
Now in the center of your bodyfur draw a small rectangle shape for his belt like this
Now we want to add the same eye-candy 4000
glass effect as we did on his boots and mittens. You should still have those
settings in your default;)) Now only a couple more details and we will
be done, Add another layer and name this layer belt 2. Change your
background color to white this time using the same preset shape your rounded
rectangle draw a smaller rounded rectangle just inside the black one you just
drew like this.
Now go to effects, plug-ins, eye-candy 4000, fur an use these settings
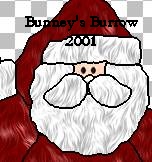
Guess what your done LOL. I hope you like the results, You can merge visible all layers now and export your santa as a tube if ya want, Or make him into part of scenery;0) The choice is yours. I hope you have enjoyed this tutorial as much as I have creating him for you, As always, if something isn't clear or I have left something out please don't hesitate to email me at kitchel@isponline.net and I promise to answer all email as soon as possible:)) While you are here why not try some of my other tutorials? This Tutorial ©
Bunney's Burrow
2001
|