|
Meet The HipHops Bunny Tutorial Page 3
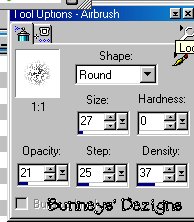
Ok Now we want to click on our
ear layer and we are going to use our airbrush to give the ear some detail so
click on your airbrush tool
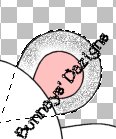
Using your magic wand and making sure you are on your ears layer click on your image where your ears are you should now have the marching ants around your ears. If the ants are around the whole image go to selections invert so that the marching ants are only around the ears. I am still using the color black for my foreground color. Now spray just a few spritz on the ear To your liking:0) Make sure you don 't forget the other ear. Here is what you should have now:0) Or something similar.
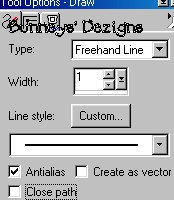
We want to spritz each of our layers with the airbrush so continue on each layer using your airbrush to spritz a bit of black to give the bunny some detail. Make sure when you click on each layer that only the marching ants are around the layer you want to airbrush;0)) Once you have all your layers spritz with the airbrush. We want to go to the feet layer and using our magic wand click on your feet so that they are selected. Using your draw tool settings
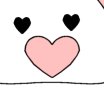
Now draw him a couple toes on each foot. Use your imagination doesn 't have to be like mine:0)) That's what makes each one original! Ok once you have your feet the way you want them we want to go back to our head layer We are now going to add eyes and whiskers. Add a new layer and name this layer face details. Now we are going to use our shape tools again this time I have chosen the heart shape I have used the heart shape for the rest of the tutorial. We are going to make the eyes now.
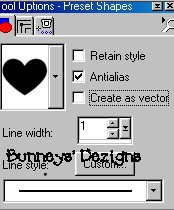
Go to your present shapes tool and locate the heart. I have about three different shape hearts in my present shapes so its up to you which one you chose to use;0) To make the eyes we need to make both our foreground and background colors black. We don't need these to be vector so we need to change our settings to this.
Now draw you a small heart where you think the eye should go. As I have done here.
Now go to edit copy and edit paste as a new selection and place the other eye on the other side. Ok now we need to change our colors for our mouth. I have chosen the same color I used for my ears which is # FFCOCO . Make sure your foreground color is black and the background color is #FFCOCO or which ever color you have chosen. Now we want to draw a heart for the mouth. This one is going to be a little larger. so go ahead and draw you a mouth like this.
This one looks funny here as I was recreating I just kind of did
a recreation. Anyway, We want to add a small black line to the middle of his
mouth so using our draw tool
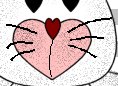
Draw you a curve line from the middle of your heart to the point of your heart. While we have our draw tool out go ahead and draw him some whiskers using your imagination. Play around with it and always remember if you don't like what you see go back and undo;0) Ok now we want to add our airbrush to his mouth. Make sure you change your color back to black both foreground and background . Now go back to your airbrush tool using the same settings as before.
Using your magic wand click on your heart and make sure your marching ants are around the heart mouth. Spritz a few black painting here and there like so.
Ok Now all we have left is the nose and we cant leave that out can we LOL.. So once again change your foreground color to black and your background color is the color you have chosen for your nose I have chosen color #800000 Go back to your present shapes and make sure you are still on your heart and draw a small heart in the center of the heart you used for your mouth. You now have a nose:0))
You can now dress him up any way you like. I
took it a step further and used more of my shapes in my shapes folder . If
you don't have these
shapes like the hat or the ribbon you can download them at www.jasc.com
and unzip them to your psp 7 shapes folder. And wala you have your self a bunny.. Make
a whole bunch while your at it lol.
This Tutorial ©
Bunney's
Burrow 2001
|