|
Create an Easter Tulip using PSP 7 Page 2
For our stem we want to create a
new layer and name this layer stem. Set your foreground color to a green you
want to use for your stem green you want to use for you I am using color
#076707 . We want to set our background color to null like this
Click on your draw tool
Now draw you a stem on your tulip like this or something similar don't worry we are going to move our layer here in a second.
We are going to add an inner bevel to our stem to give it more depth. So go to effects 3D effects and inner bevel. Use the same settings we used on our petals like this.
Now we need to move this layer below our tulip layer . Your layer palette should look like this at this point.
Now we have to have a leaf for our tulip. So create a new layer
and name this layer leaf.
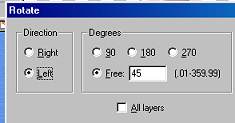
Add the same inner bevel that we used on our stem and tulip to your leaf. Go to effects 3D effects inner-bevel and apply those settings. We need to rotate this image to get it next to our tulip. So go to image flip and image rotate left and use these settings.
Move it over to your stem on your tulip and place it where you
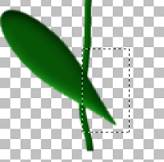
would like it. Now its going to over hang the stem so we are going to fix that.
Go to view zoom in by 1 I do this so I can see better what I am doing. I am
going to cut part of my leaf away at this point. To do this we are going
to use our selection tool
Now if you go to edit cut this takes this part of our leaf away so that its no longer overlapping our stem. You can either leave your tulip with one leaf or two. I have used two in my sample so if you want to use two we want to go to edit copy edit paste as new layer and mirror this leaf so that we can put it on the right side of our stem. This is what mine looks like now.
If you chose to use two leafs as I have done we need to now merge these two layers . So make sure you have placed an x on layers tulip , stem and layer 1 and merge your leaf layers and rename this layer leaf.
Now I wanted my leaf and stem to be a little brighter so I am going to go to colors adjust brightness/contrast and use the same settings as we used on our tulip. Make sure you do both your stem layer and your leaf layer if you chose to adjust the brightness .
We want to move the stem layer in front of our leaf layer so on your layer palette should now look like this.
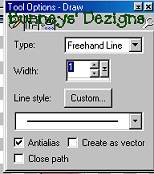
The only thing left is to add the veins for the leafs. To do this we need to use our draw tool and chose a darker green or black for the veins. I am using #064606. On your draw tool we want to use these settings.
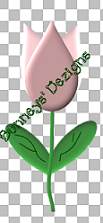
Be creative with your veins. Use your imagination. Once you get your veins done This is what we have now.
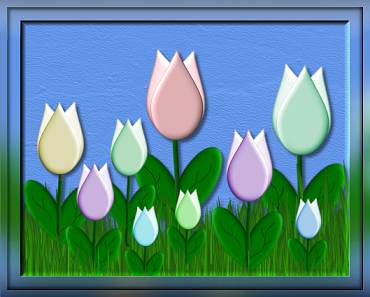
I have colorized my tulips to have several different colors
without having to redo my whole tulip. So we want to get a copy of this
flower use your shift D on the keyboard to copy this image. Now you can colorize
the flower to do this make sure you are on your tulip layer and go to colors
colorize and play around with the settings to get the color you want. Make
as many as you would like but make sure before you tube your image or use it in
a backdrop you need to merge visible all your layers . And that's it. Simple
huh?
This Tutorial ©
Bunney's
Burrow 2001
|
 to do this click on your little arrow and another screen opens up


