|
Bunney's Cow Tutorial Page 3
Add a new layer and
name this layer ears. Using your shapes tool we want to change the eclipse
back to the teardrop shape for our ears. Change your background color to
black so that we have both the foreground and background colors to black. Now
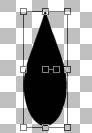
draw a small teardrop shape similar to this one.
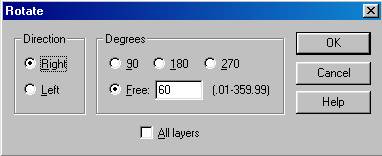
Now I am going to flip my ear, go to image flip and we need to rotate it so go to image rotate and use these settings
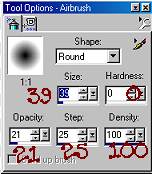
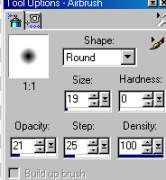
While we are on this layer we want to use our magic wand and click on our ear, make sure you have your marching ants around your ear. Go to selections invert if you need to to get the marching ants only around our ear. Now using your airbrush once again use these settings
Chose a pink or peach color to fill your inner ear I
am using #F9C2C2. We want to just change the foreground color. Not the
background! Begin filling in the inner ear with your airbrush. This is what
mine looks like
tGo to edit copy and edit paste as new layer and then image mirror. Place the mirrored image on the right hand side of the head. Once you get your ears placed where you want them we want to merge these layers. Go to your layers palette and place an x on all layers except your ears layers. You should have two for your ears. Merge these two layers together and rename this layer ears.
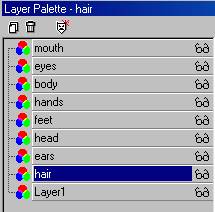
Your layer palette should be like this in order from top to bottom, mouth body, hands, feet, head, ears, layer 1.
We are almost done;0) Add a new layer name this layer eyes. Change your foreground color back to black. Your foreground color should be black and the background color should be white. Go back to your shapes tool and click on eclipse. We do not want this one to be vector so make sure your vector is unchecked at this point.
Draw a small eclipse something like this.
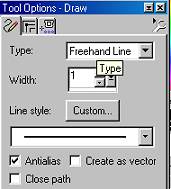
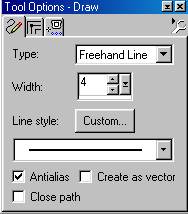
Using your draw tool
Draw a slant line across the eye similar
to this one
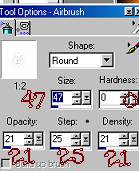
Going back to your airbrush we need to paint the eyes
on our eyelid, so go to your airbrush tool and paint one round dot on the
bottom side of the eye lid. Use these settings
Go to edit copy and edit paste as a new layer and place this eye on the opposite side of the other one. Like this.
Using your draw tool once again using the same settings as before draw a couple of eyelashes on each side of the eyes. Like the picture above. After you have your eyes placed where you want them place an x on all layers except the eyes you have just drawn, Merge visible these two layers and rename this layer eyes.
Go back to your head layer and using your airbrush tool, paint him a spot right above his eyes. Use your airbrush with these settings to paint the little specks of black as I have done
Add a new layer and name this layer hair. Using your
draw tool with the same settings as before the line being 1 draw a few
sprigs of hair on top of his head. Now change the settings to this
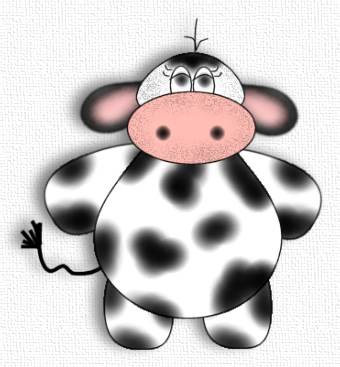
And draw you a tail for your cow. Use your
imagination.. I just added a few more hairs on the end of my tail. And thats
it. You now have you a cow. We want to merge these layers visible. But
before you do make sure your layers are in this order
That way all your body pieces are in order for each part. Merge visible all layers and you can now tube it. Or use in an image. Just let your imagination overflow:0)
I hope you have enjoyed this Tutorial,
If you have any questions or something isn't clear please email me at kitchel@webworkz.com
and I will answer you as soon as possible:)) This Tutorial ©
Bunney's
Burrow 2001
|