|
Bunney's Santa Bear Tutorial Page 2
Change your background color to a
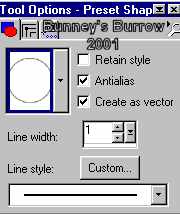
deep red, I am using #CE393B. Using your preset shapes tool
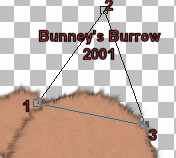
Draw a triangle toward the top of
the right side of your bears head.. Using your object selector tool
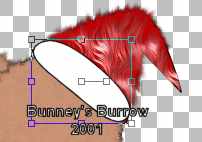
right click on the inside of your hat and go to
node edit, pull node 3 in toward the bears head like this
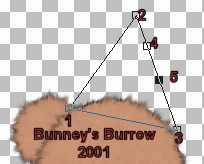
Using your ctrl on your keyboard click on the line just below node 2 until you see the words add. Add a node just under node 2 and another node just below node 4 like this
Now drag node 2 to the right just a little. node 5 needs to be brought in
toward the center of the hat. Node 4 needs to be brought down and out. like
this
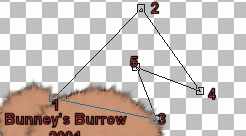
Right click on node 2 and go to go to node type and chose symmetric. Do this
also to node 4 and node 3. Some more if needed. When you get your hat shaped
the way you want it right click and go to quit node editing and then to
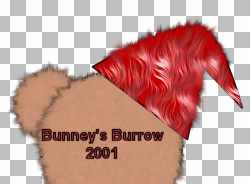
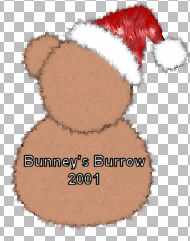
layers convert to raster. Name this layer hat. This is what mine looks like.
Mine is already showing the Eye-candy
filter applied. yours will NOT have that yet!
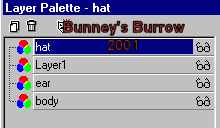
Open your layer palette and make sure that the hat layer is above layer 1 like
this.
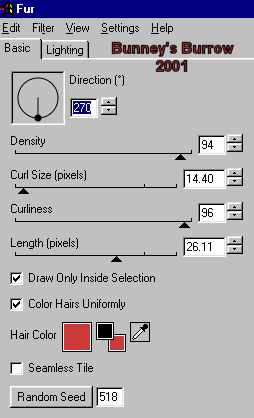
I have applied the filter Eye-candy
4000 fur with these settings (optional)
The hair color was the exact same color I used for my hat. I
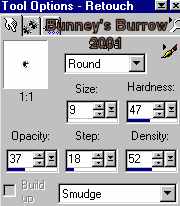
also used my retouch tool
And went around the outside of my hat. This is also optional;)) Now once again
we need to use our preset shapes tool
Change your background color to white. Now just below the bottom part of the hat draw an oval shape. This will be for the fur of the hat. On this one we need to rotate it a little so that it fits right at the bottom of the hat. Move your mouse over the inside where you just drew the fur rim. Then rotate it a little to the right so that it fits pretty plush with the bottom of his hat. Using your object selector tool right click and go to node edit, adjust the nodes so they are covering the bottom half of your hat you may need to bring a node up or in. This is what it should look like now.
Once you get your hat rim the way you want it, right click and go to quit node
editing. Then go to layers, convert to raster. Name this layer rim. I applied
the same Fantastic Machines, Paint Engine filter to the hat rim. Use the same
settings as before. I also used the retouch tool
Ready to finish up?? Then go to page 3. This Tutorial ©
Bunney's Burrow 2001
|