|
All Dressed Up For Page 3
Add a new raster layer and name
this layer legs. Using your preset shapes tool
Once you have your leg set the way you want it,
go to edit copy, edit paste as new selection and place it on the opposite side
go to image mirror and place on the opposite side of your bears body. This is
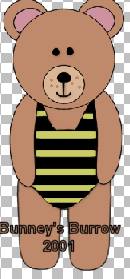
what your bear should look like now;))
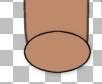
In your layers palette your leg layer should still be highlighted if not highlight your leg layer and then add a new layer and name this layer foot, Using your preset shapes tool We are using the ellipse shape once again this time create as vector IS NOT CHECKED. Right at the base of your bears leg draw a small oblong circle for the bears foot like this
Once you have your foot set the way you want it go to edit copy, edit paste as a new selection and place on the other bears foot.
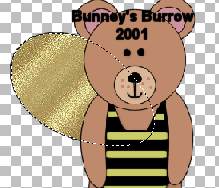
Now your bear is almost done, We need to
add his wings, Add yes you guessed it another layer lol. Name this layer wing.
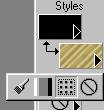
You need to change your background color to white now. Your foreground
(styles) color should still be set at black. Using your preset shapes
tool
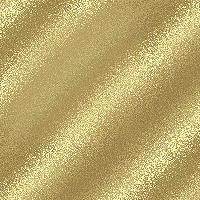
Now I am going to add the gold. Using your magic wand
click
anywhere on your image, we want the marching ants to be around your wing, you
will have the ants going around the entire image as well as the wing so go to
selections invert and this will put your marching ants around your wing only.
Add a new layer, don't move your marching ants they still need to be around your wing ( I hope I don't lose ya on these steps) after you add a new layer we are going to flood fill it with this pattern just right click and save as to your computer, put this into your PSP patterns folder
To flood fill change on your background color click and hold on the little arrow a window opens up like this
You need to click on the one with the dots and then another window opens up browse to find your pattern that you just saved to this folder . We want the background color set to the gold pattern and the foreground (styles) color set to black.
You should still have your marching ants around your
wing, and should still be on the new layer you created now go
to selections modify contract by 2. and using your flood fill tool
You have covered your white up, But don't worry that's the way we wanted it , I added this pattern fill to a new layer because we need to lower the opacity on it and if we just flood filled it with the pattern only then when we lower the opacity it would be transparent and we needed that layer of white behind it so that it wouldn't be transparent. So open your layer palette again make sure you are on the gold pattern fill layer that you just created. And slide the bar on the right down to 80 like this
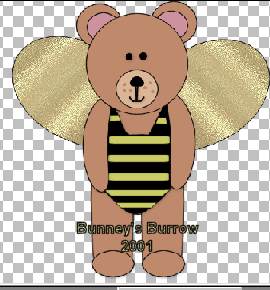
Now while you still have your layer palette open place a red x on all layers except your wings layer and the layer you created to flood fill your gold pattern with, We want to merge visible just these two layers so that it only creates one layer. Merge visible these two layers, rename this layer wings.
Go to selections, select none (this is important as we want to copy the outside area of the wings also) So go to selections select none, then go to edit copy, edit paste as a new selection then image mirror and place on the opposite side of your bear like this
Did I lose you??? I sure hope not. Now we need to edit
paste as a new selection again Now make sure you are still on your wings and
once again go to edit copy, edit paste as a new selection, make sure
you keep your image selected because we are only going to work with this
part of the wings. Then image flip, We need to make these smaller so using
your deformation tool
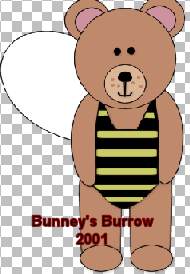
Once you have it set the way you want it then double click to apply the deformation. Now you can go to selections, select none. We are almost done I promise but we do need to add some detailed features to our bear:0) I have zipped up a Halloween treat bag for you if you wish to use it, I created this from a dingbat and made it into a preset shape. But have also zipped it up as a tube if you would like to use it. Note this tube is for PSP 7 only! It will not work in psp 6 or lower. You can download that here. Unzip it to your psp tubes folder.
If you have chosen to use the tube for his Halloween treat bag, Then on your bear image highlight your eyes layer and add a new raster layer and name this layer bag. Apply your tube, I set mine to scale of 47, this of course may vary depending upon the size of your bear. My step was set at 200.
Go to view zoom in by 1 (one). We need to get rid of
some of the handle so that he is carrying the bag. So zoom in at your bag
handle and using your freehand tool
Now draw around the selection around the handle like this
Get as close to the bear arm sides as you can, now hit delete on your keyboard to get rid of this selection. Looks like the bear is holding the bag better now:0) Now you can go back to view normal viewing if you wish. You can add some words to the bag if you wish.
We can forget the antlers of whatever you would call
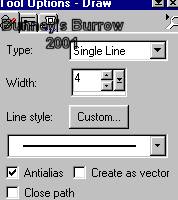
those for a bee LOL. So add a new layer and using your draw tool
Now draw two lines on top of your bears head going
upward and out like this
Now using your preset shapes tool
Now last step phew LOL. Using your draw tool once
again
I added a drop shadow to different areas of his body, but this is up to you. You are now finished with your All Dressed up for Halloween bear!
Sometimes these tutorials get very long and I am sorry, But I am one for lots of detail. And when they get long I am always afraid I might forget something so I try to recreate the tutorials as I write them to try to eliminate me leaving anything out but sometimes this can happen. So If I have left anything out or something is unclear to you please don 't hesitate to email me at kitchel@webworkz.com and I will answer all email as soon as possible. I hope you have enjoyed this "All dressed up for Halloween" tutorial.This Tutorial ©
Bunney's
Burrow 2001
|