|
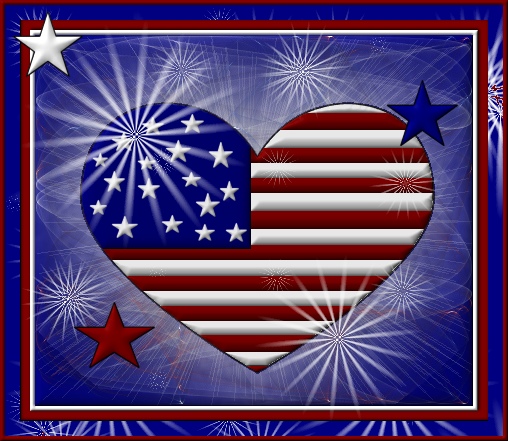
Bunney's All
American Heart Tutorial 
Highlight
your heart layer in your layer palette. Go to effects,
plug-in filters, Eyecandy 4000, corona, and use these settings. 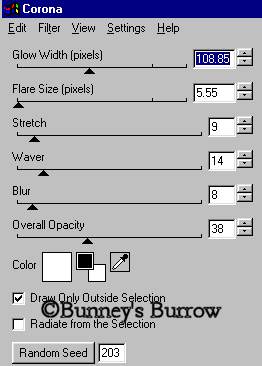
Merge
visible all layers and rename this layer heart. Once
again we want to use our stardust filter. Go to effects,
plug-in filters , VM Natural stardust and use these settings. 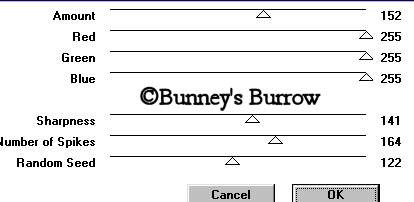
Now
we are going to use the starmaker. Go to effects, plug-in
filters, VM Natural and this time use starmaker with these
settings 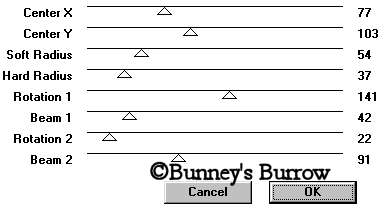
This
is what you should have up to this point. 
The
original image will look a bit different then the one in this
tutorial, I created this for stationery and did not save any
settings. I had some very nice ladies ask me how I created this
and wanted me to write a tutorial. I tried recreating this
image the best I could. I got as close as I could so just so you
know this tutorial image will not look the exact same as the one
at the top of this tutorial. Now
back to the tutorial, Change your background color to
white. Go to image add borders and use these settings (if a window
pops up just click yes to the window). 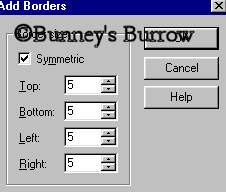
Using
your magic wand  select the white part of the border you just added. Using
the same inner bevel as we used on the heart add an inner bevel
to the border.
Go to selections
invert. This puts the marching ants around the
inside of the border you just added. Add a cut
out effect using these settings. 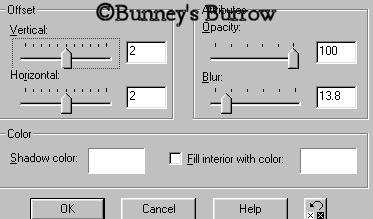
Go back and add the same cut out effect only this time change
the vertical and horizontal to -2 (minus 2). Go to selections,
select none. Change your background color to dark red #800000
and go to image add borders and use these settings. 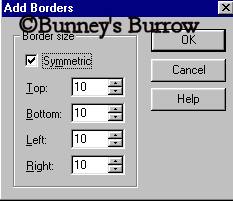
We
are not going to do anything else to this border. Change
your background color to the dark blue #000080. Add another
border only this time change the settings to 15 (choosing
symmetric and typing in 15 will change all your boxes to 15
that's what we want). Now for the blue border I added the
stardust filter so go to effects, plug-in filters, VM
Natural, Stardust and use these settings. 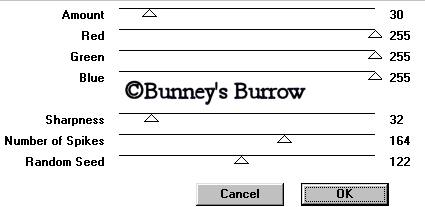
I
added one more stardust filter again using these settings. 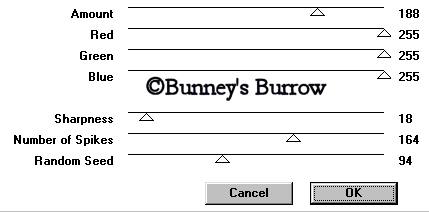
Go to selections
invert. Go to effects, 3D effects, cut out and use these settings. 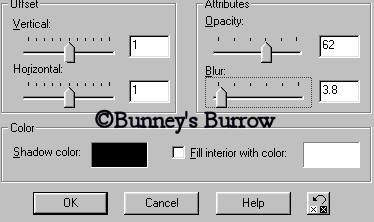
Add
another cut out effect only change the settings to vertical and
horizontal -1 (minus one). Change your background
color to the dark red #800000. Add another symmetric border,
this time change the settings to 5. Using your magic wand select
the border you just added. Apply the same inner bevel we have
been using thru out this tutorial. Go to selections
invert and apply the same cut out effect, making sure that you
use both the 1 (one) And the -1 (minus one) effects. Then go to
selections, select none. This is
what you should have this far. 
Take your three psp stars
tubes that you downloaded at the
beginning of the tutorial. Place them on your image if you wish. Also make
sure you add them to a new layer if you use these tubes. Also
make sure if you use these stars that you use the whitestar2 for
this part of the tutorial it will have the black outline,
Whitestar does not! I applied the same inner bevel we used
thru-out this entire tutorial. Here is what mine looks like now. 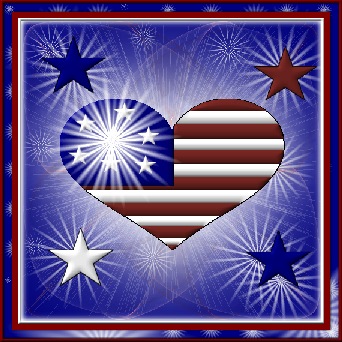
Please
remember that your image will be larger and show more detail
then the image shown above. You can merge visible all layers now
if you added stars. You are now finished. I hope you have
enjoyed this tutorial as much as I have creating it. As always,
if I have left something out or something is unclear please
don't hesitate to email me at kitchel@webworkz.com
and I will answer all email as soon as possible. Bunney's
Burrow
Tutorial Written by Bunney Copyright
©Bunney's Burrow
2001.
|